Most people use Canva the slow way: clicking through menus, dragging things around one at a time and redoing the same edits on every page. Canva has dozens of shortcuts and small features that make design faster, and most beginners never find them.
Here are 30 Canva tips and hidden features, all checked against Canva’s own Help Center. Most of them work on the free plan. The few that need a paid plan are marked, so you know before you go looking for them.
Who this is for: beginners who already use Canva and want to work faster, especially if you make printables, templates or social posts to sell. If you’re new to selling, read our list of 25 Etsy digital products you can make in Canva next.
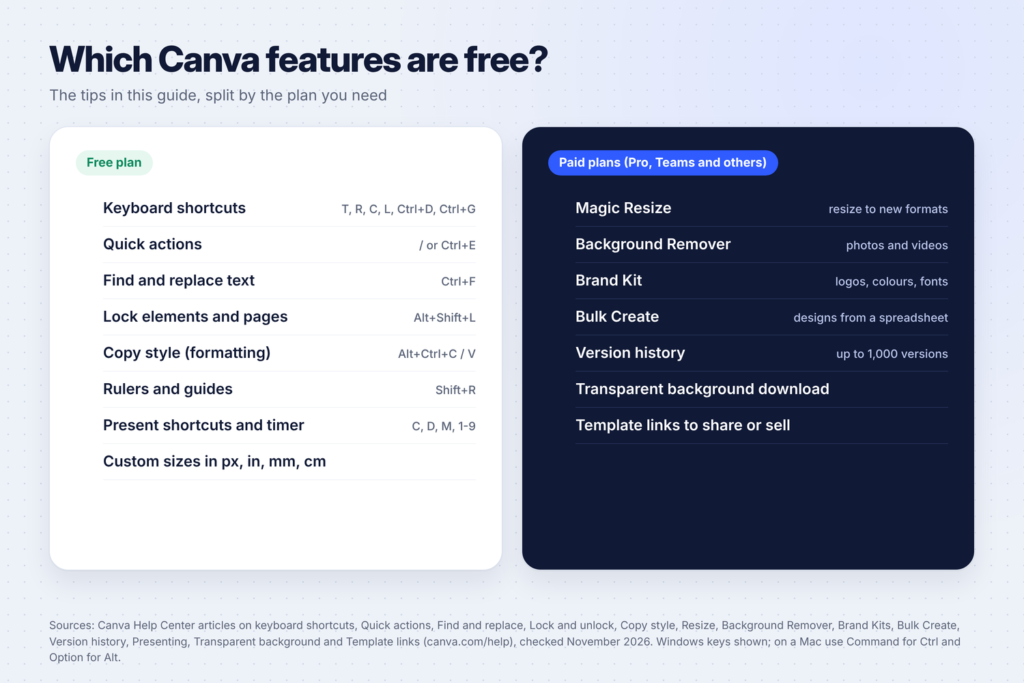
A quick note on keys: the shortcuts below are the Windows versions from Canva’s keyboard shortcuts page. On a Mac, use Command instead of Ctrl and Option instead of Alt.
Keyboard shortcuts that save the most time (1-10)
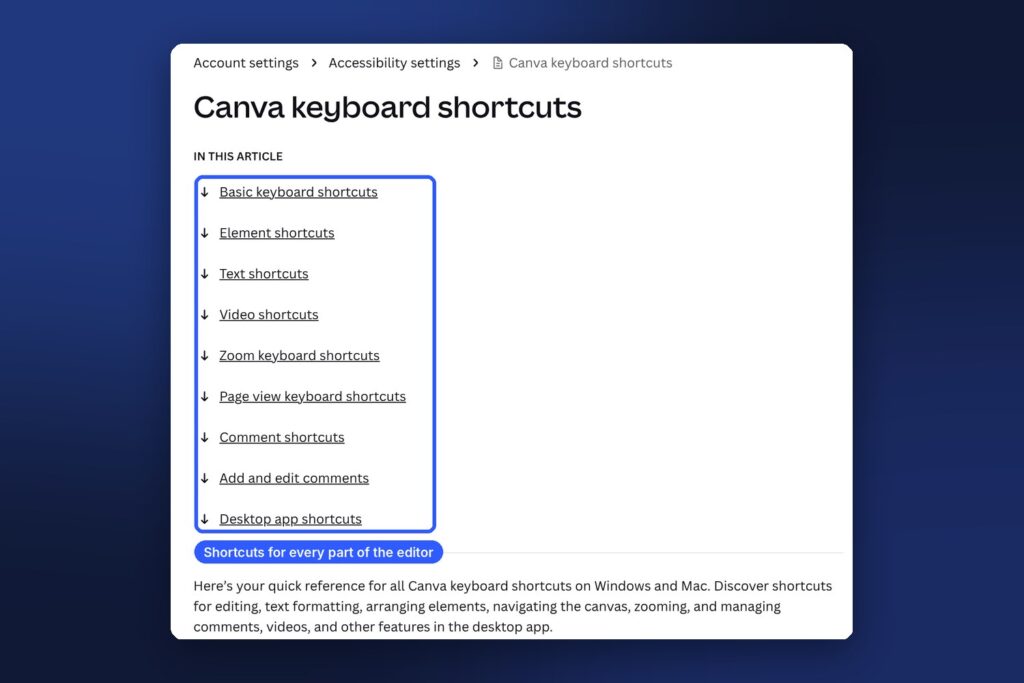
1. Add elements with one key
In the editor, press a single letter: T adds a text box, R adds a rectangle, C adds a circle and L adds a line. S adds a sticky note. It’s much faster than opening the side panel every time.
2. Open Quick actions with the slash key
Press / (or Ctrl + E) to open Quick actions. Canva’s Quick actions help article says you can use it to add animations, open features like the photo editor, download and share designs, and reach your projects. Type what you want instead of hunting through menus.
3. Duplicate anything with Ctrl + D
Select an element (or several) and press Ctrl + D to duplicate it. Perfect for repeating checklist rows on a planner page or icons in a row.
4. Group and ungroup
Select several elements and press Ctrl + G to group them so they move together. Ctrl + Shift + G ungroups them. Group a heading and its underline once, and you’ll never nudge them out of line again.
5. Tidy up messy layouts
Select several elements and press Alt + Shift + T to tidy them up. Canva lists this as “Tidy up elements” in its shortcut table. It’s a fast way to even out the spacing on a row of icons or photos.
6. Move in bigger steps
Arrow keys nudge a selected element a small amount. Hold Shift with an arrow key to move it a larger step. Use Ctrl + arrow keys to resize in small steps, and Shift + Ctrl + arrow keys for larger ones.
7. Add a page without the mouse
Press Ctrl + Enter to add an empty page and Ctrl + Backspace to delete an empty page. Handy when you’re building a multi-page planner or e-book.
8. Add a link in one step
Select text or an element and press Ctrl + K to add a link. This is how you make clickable buttons in a PDF guide or a digital planner.
9. Format text faster
A few text shortcuts worth learning:
- Shift + Ctrl + K turns text into uppercase.
- Shift + Ctrl + . and Shift + Ctrl + , increase or decrease the font size by one.
- Shift + Ctrl + C centres text, Shift + Ctrl + L aligns left and Shift + Ctrl + R aligns right.
- Shift + Ctrl + F opens the font menu.
10. Copy a text style to other text
Select styled text, press Alt + Ctrl + C to copy its style, then select other text and press Alt + Ctrl + V to paste the style. Canva’s Copy style help article also describes a paint roller button that does the same for other elements.
Editing tricks beginners miss (11-18)
11. Find and replace text across a whole design
Changed a product name or a date that appears on 20 pages? Go to File, then Find and replace text, or press Ctrl + F. Canva’s help article says you can review each match before choosing Replace or Replace all. It also notes that text inside locked elements won’t update, so unlock them first.
12. Lock elements so you don’t move them by accident
Select an element and press Alt + Shift + L to lock it. Canva’s lock help article explains there are two kinds: a full Lock stops changes to position, style and content, while Lock position keeps the position and style fixed but leaves the content editable. Locking a background is the easiest way to stop it moving when you click on the page.
13. Show rulers and guides
Press Shift + R to show rulers and guides. Drag guides onto the page to line things up, then lock them with Alt + Ctrl + ;. Guides are especially useful for print designs, where you need to keep text away from the edges.
14. Open the layers view
Press Alt + 1 to show layers. When elements sit on top of each other and you can’t click the one underneath, the layers view lets you pick it directly.
15. Move elements forward and back
Use Ctrl + ] to bring an element forward one step and Ctrl + [ to send it back. Alt + Ctrl + ] brings it all the way to the front, and Alt + Ctrl + [ sends it all the way to the back.
16. Switch between proportional and free resizing
Press F2 with an element selected to toggle between proportional resizing (keeps the shape) and single-axis resizing (stretches one side).
17. Select several elements without dragging
Hold Shift and click elements to add them to your selection. Ctrl + A selects everything on the page. Tab and Shift + Tab jump to the next or previous element.
18. Design in inches, millimetres or centimetres
You don’t have to work in pixels. Canva’s resize help article explains that when you choose Custom size, you can pick px, in, mm or cm as the unit. Use inches or millimetres for anything you’ll print, like a US Letter planner or an A4 worksheet.
Viewing and presenting tricks (19-23)
19. See every page at once with grid view
Press Alt + Ctrl + 3 for grid view, which shows all your pages as tiles. It’s the easiest way to reorder pages in a long planner or deck. Alt + Ctrl + 2 switches to thumbnail view and Alt + Ctrl + 1 to scrolling view.
20. Zoom to fit
Press Alt + Ctrl + 0 to zoom to fit the page on your screen, Ctrl + 0 for actual size, and Ctrl + + or Ctrl + – to zoom in and out.
21. Start presenting from the keyboard
Press Alt + Ctrl + P to open presentation mode without leaving the editor.
22. Add a timer while you present
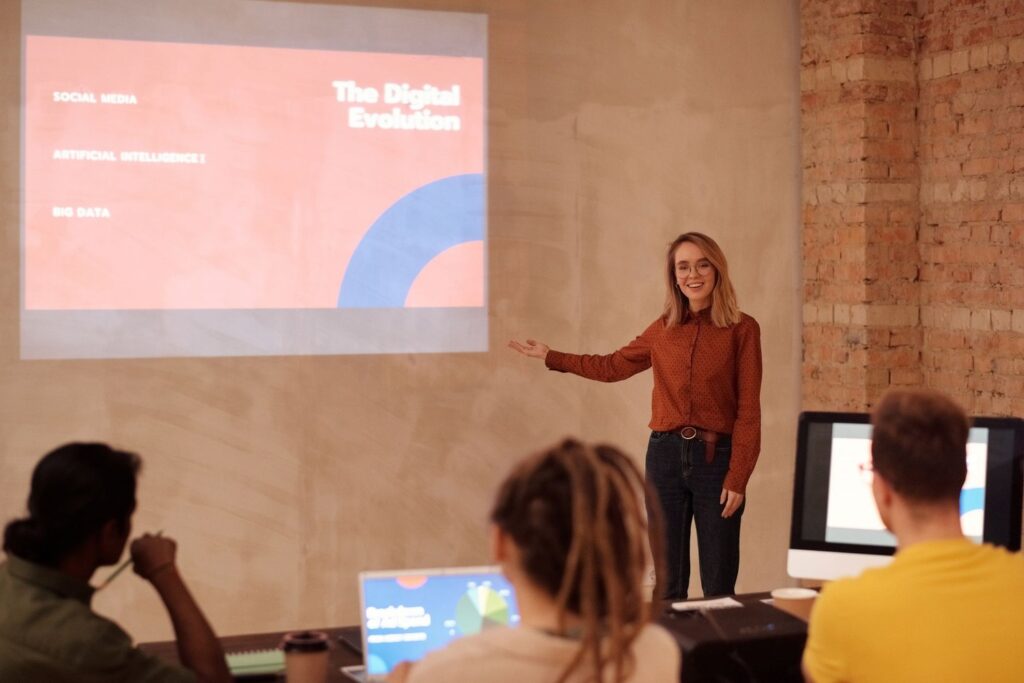
Canva’s presenting help article says that while presenting you can press any number key to start a timer: 1 for one minute, 2 for two minutes and so on. It’s useful for workshops, classes and timed brainstorms.
23. Use Magic Shortcuts for fun effects
During a presentation on a computer, press C for confetti, D for a drumroll, M for a mic drop, O for floating bubbles, B to blur the slide, Q for quiet and U for a curtain call. Press Shift + / or ? to see the full menu. Canva says these are only available when presenting on a computer.
Organising and working with others (24-26)
24. Leave comments on a design
Press Alt + Ctrl + N to add a comment. Comments are useful when you design for clients or work with a partner: you can leave notes on the exact element that needs changing.
25. Undo, redo and save
The basics still matter: Ctrl + Z undoes, Ctrl + Y redoes and Ctrl + S saves. Canva saves automatically, but Ctrl + S is a habit that doesn’t hurt.
26. Know what Version history needs
Canva’s version history article says paid users can access up to 1,000 previous versions of a design, and free users don’t have access to Version history. On the free plan, duplicate an important design before making big changes so you can always go back.
Paid features worth knowing about (27-30)
These need a paid plan (Canva Pro, Teams or similar), but they’re worth knowing because they save hours if you design often.
27. Magic Resize
Turn one design into other sizes, like an Instagram post into a Pinterest pin or a story. Canva’s resize help page lists Pro, Business, Enterprise, Education, Higher education, Nonprofits and Teams as the plans that include it, and notes it isn’t available in Canva Docs. If you sell templates in several sizes, this one feature can justify the upgrade.
28. Background Remover
Canva’s Background Remover help article says the feature is included with paid plans. It removes photo and video backgrounds in one click, and you can even process a whole folder of uploaded photos from the Projects tab.
29. Brand Kit
A Brand Kit stores your logos, colours and fonts so they’re one click away in every design. Canva’s Brand Kit help article says Brand Kits are available on Canva Pro, Teams and other paid plans. If you’re still making your logo, our guide on how to make a logo with AI for free shows how to build one you can own.
30. Bulk Create
Bulk Create turns rows of data into separate designs: one certificate per student name, one social post per quote, one price tag per product. Canva’s Bulk Create help article says it’s available on desktop web and the desktop app for paid plans including Pro, Teams, Business, Enterprise, Education and Nonprofits.
How to practise these tips (without memorising 30 things)
Don’t try to learn everything at once. Pick three shortcuts that match what you do most:
| If you mostly make… | Learn these first |
|---|---|
| Planners and printables | Ctrl + D (duplicate), Ctrl + Enter (add page), Shift + R (guides) |
| Social media posts | T (text), Alt + Ctrl + C / V (copy text style), Ctrl + G (group) |
| Multi-page e-books or guides | Ctrl + F (find and replace), Alt + Ctrl + 3 (grid view), Ctrl + K (links) |
| Presentations | Alt + Ctrl + P (present), number keys (timer), Magic Shortcuts |
Use them for a week until they’re automatic, then add three more.

Is Canva Pro worth it for these features?
If you use Canva occasionally, the free plan covers almost everything on this list: all the keyboard shortcuts, Quick actions, find and replace, locking, guides, custom sizes and presentation tricks.
Upgrade when one of the paid features saves you real time every week. For example, if you resize every design for three platforms, Magic Resize pays off. If you sell templates, you’ll need a paid plan to share template links. Canva’s help article on sharing template links lists it as a feature of Pro and other paid plans, and our guide to Canva templates you can sell explains how that works.
FAQ
What are the most useful Canva shortcuts for beginners?
Start with T (add text), Ctrl + D (duplicate), Ctrl + G (group), / (Quick actions) and Ctrl + F (find and replace). These five cover most everyday editing.
Do Canva keyboard shortcuts work on Mac?
Yes. Canva’s shortcut page lists both Windows and Mac versions. On a Mac, use Command where Windows uses Ctrl, and Option where Windows uses Alt.
Can I see older versions of my Canva design for free?
No. Canva says Version history is available on paid plans, with up to 1,000 previous versions, and free users don’t have access to it. On the free plan, duplicate a design before big changes.
Is Magic Resize free in Canva?
No. Canva’s help center lists it on paid plans such as Pro, Teams and Education. It also isn’t available in Canva Docs.
How do I stop elements moving when I click on my design?
Lock them. Select the element and press Alt + Shift + L (Option + Shift + L on a Mac). Pressing it again cycles through the lock options.
Keep going
Put these tips to work. See 15 side hustles you can do with Canva, browse 50 printable ideas that sell on Etsy, or start building products from our list of 25 Etsy digital products you can make in Canva.